English
 русский
 Deutsch
Industry News

+86-576-85198260
Welcome to Linhai Jingda Arts & Crafts Co., Ltd.
Welcome to Linhai Jingda Arts & Crafts Co., Ltd.
Oct 17, 2025
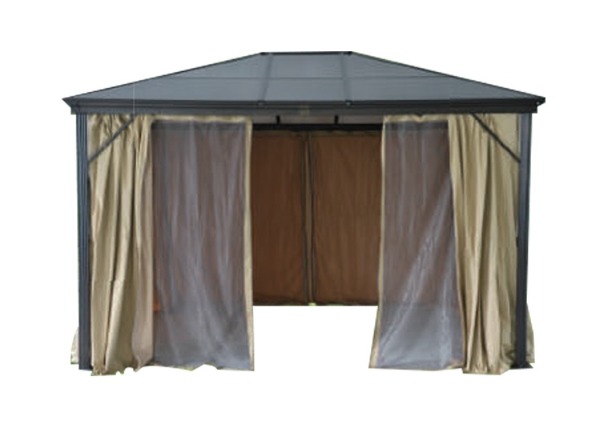
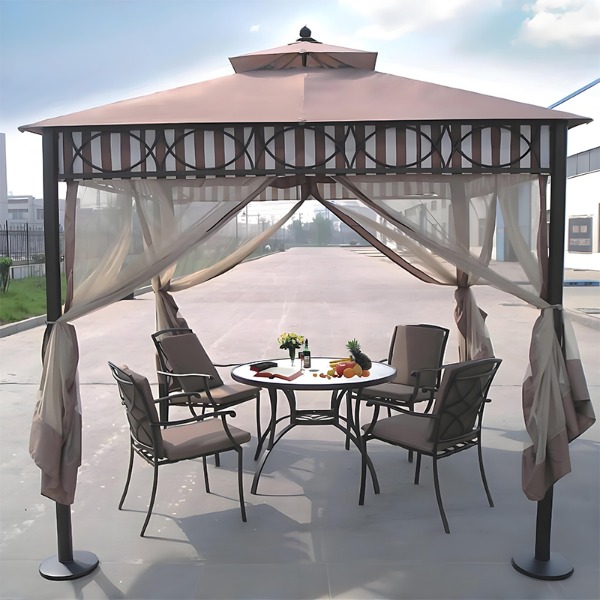
When preparing for your next outdoor gathering, installing a Waterproof Pop Up Gazebo can provide both weather protection and insect shielding. A Gazebo With Netting gives you the covered space and allows fresh air to circulate while keeping bugs out.
1. Pre-Installation Preparations
Before you begin, preparing your site and components is essential:
Check all parts: Lay out the frame pieces, roof canopy, netting panels, corner joints, fasteners, stakes, and any weights or guy ropes.
Clear and level the site: Choose a flat area free of sharp rocks, sticks, or debris. Uneven ground can make installation harder and stress the frame.
Check weather conditions: Avoid installing during strong winds or rain. Even with a Waterproof Pop Up Gazebo, heavy wind during setup can damage the frame or canopy.
Inspect netting and zippers: Ensure the Gazebo With Netting panels are intact, zippers running smoothly, and no snags.
2. Step-by-Step Installation Guide
Frame Unfolding and Setup
Unfold the frame
Begin by partially expanding the frame, opening it from its collapsed state.
Pull outwards from the center, extending legs just partway to allow flexibility.
Lock key joints
Most pop-up gazebos have locking pins or buttons. Engage them so the frame holds shape.
Don’t fully extend legs yet—reserve that for later.
Raise to full height
Once locked, carefully extend each leg one increment at a time, alternating sides to balance tension.
Ensure each leg is fully engaged and locked to firm height.
Attaching the Roof Canopy
Drape the canopy
Place the waterproof canopy over the top of the fully expanded frame.
Align canopy corners with frame legs.
Secure corners
Attach corner straps or Velcro to the leg tops.
Some models include tensioning straps—tighten them to pull the canopy taut.
Fasten midpoints (if provided)
For better stability, connect canopy midpoints to frame crossbars or support beams.
Adding Netting Panels
Align netting panels
Drape netting around the sides, aligning zipper edges with frame corners or railings.
Ensure panels reach all the way down to the frame base (or overlap ground, depending on design).
Attach netting
Use Velcro, hooks, or snaps along the edges to fasten netting to the frame.
Zip the panels closed, leaving entry points as required.
Check tension and fit
Pull netting gently to remove sagging but avoid over-stretching.
Ensure zippers move freely without jamming.
Anchoring & Stabilizing
Stake the legs
Drive stakes or pegs through holes in the base of each leg into soft ground, if possible.
Use weights or sandbags
On hard surfaces (concrete, tile), place weights or sandbags on each leg base to secure the gazebo.
Add guy ropes or tie-downs
For additional stability, use ropes at mid-height, anchored outward, especially if wind is expected.
Final check
Walk around the gazebo to inspect tension, straightness, netting alignment, and secure fasteners.
3. Common Problems and Solutions
Problem: Water Pooling & Sagging Canopy
One frequent issue with pop-up gazebos is water pooling on the roof, causing sagging or even collapse. To mitigate that:
Always keep the canopy taut—loose areas collect water.
Use a steep roof angle to encourage runoff.
During rain, adjust legs so the center is slightly higher or add supports.
If your canopy is not tightly fitted, rain can sag the fabric and risk leakage.
Problem: Netting Tearing or Misalignment
Netting can get caught or misaligned if:
Zippers are forced.
Edge Velcro or snaps aren’t all engaged.
Frame shifts, pulling netting off alignment.
Remedies:
Align and attach netting panel corners first.
Zip slowly, avoid pulling sideways.
Inspect netting edges after initial installation and re-tension if needed.
Your email address will not be published. Required fields are marked *
Copright © Linhai Jingda Arts & Crafts Co., Ltd. All Rights Reserved.

Custom Outdoor Leisure Patio Furniture Products